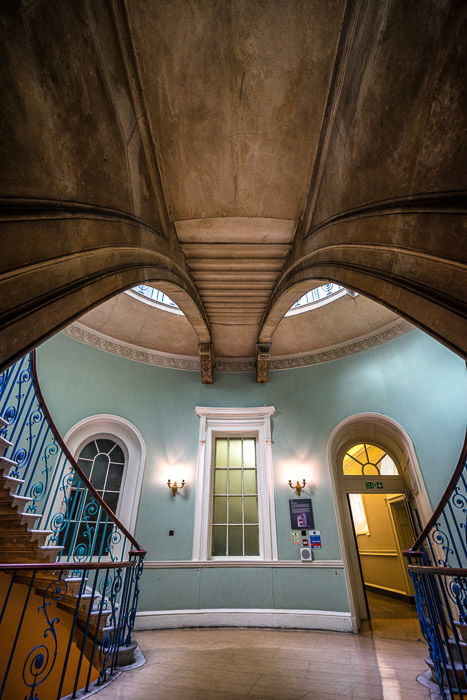
This article will show you how to use the lens correction tool in Adobe Lightroom (Lightroom and Lightroom Classic). We will also show you how to set lens profile correction to run in the background when you import images. Notice how lens correction brightened the image below and straightened the lines!
How to Apply Lightroom Lens Correction
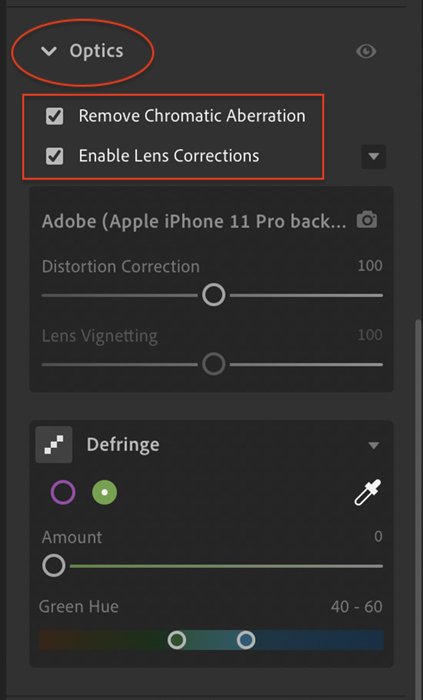
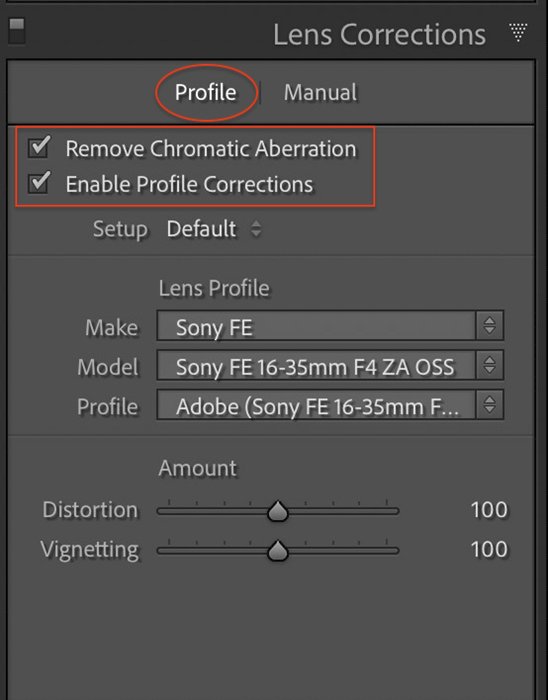
Lightroom identifies what lens you used to create the image. The program applies a lens profile correction. The Lens Correction tool in Lightroom Classic is in the Develop module. There are two tabs—Profile and Manual. In Lightroom and Camera Raw, the Lens Correction panel is called Optics. A Defringe panel replaces the Manual tab.
Step 1: Remove Chromatic Aberration
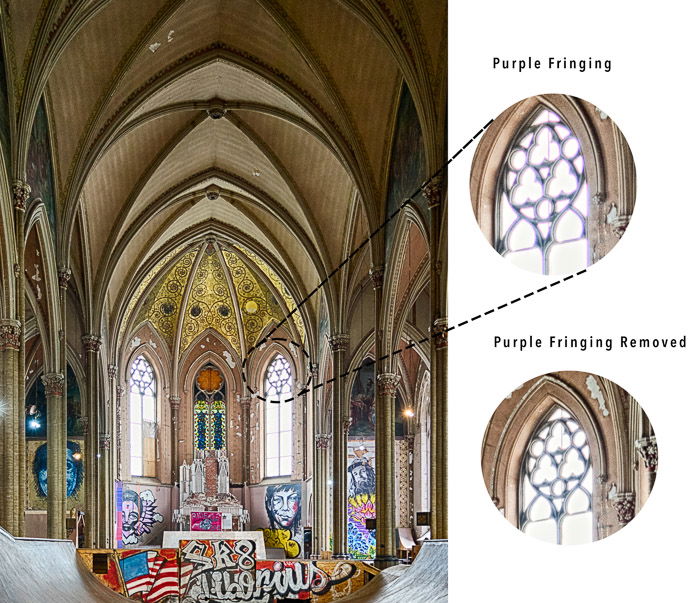
To remove color fringing, check the box next to Remove Chromatic Aberration. You may not see any difference in your image when you check this box. Many lens manufacturers correct fringing in the lens. If Lightroom detects a lens profile in the metadata, it will apply it to your image.
Step 2: Remove Optical Distortion
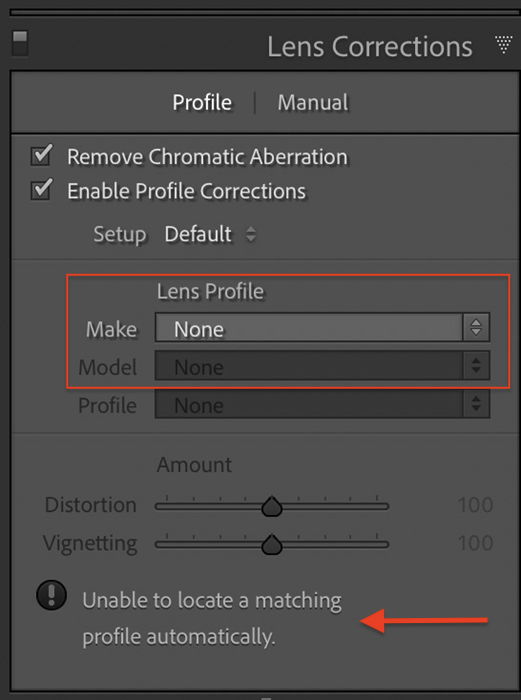
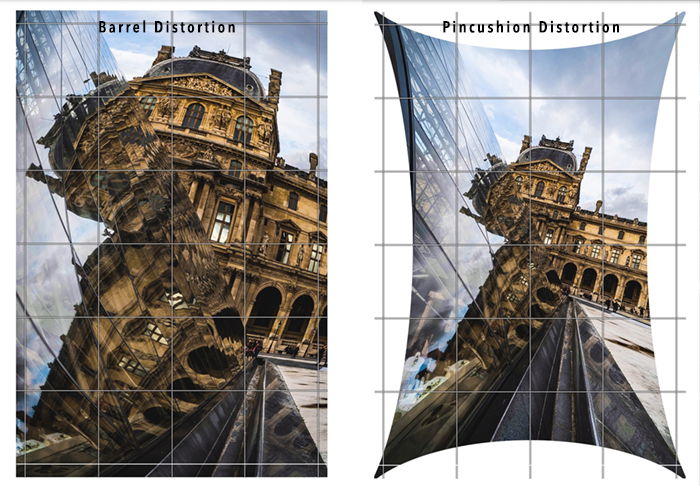
Check the box next to Enable Profile Corrections to correct optical lens distortion. Lightroom looks at the metadata of the image and fills in the make and model of your lens. Lightroom gives you the option of fine-tuning the distortion and vignetting adjustments. For distortion, move the slider to the left to correct for barrel distortion. Move it to the right to correct for pincushion distortion. Moving the vignetting slider to the left darkens the edges. Moving it to the right lightens the edges. Sometimes, Lightroom cannot detect the lens you used. For “make,” it will say”none.” Pull down the list of Lightroom lens profiles and select the make and model of your lens. There are a couple of reasons your lens may not be on the list. Adobe needs a little time to create a profile for new lenses. Also, specialty or vintage lenses may not be on the list. You may also encounter this with JPEG files. Raw files give you much more flexibility when correcting for lens distortions.
How to Create Lens Profiles in Lightroom
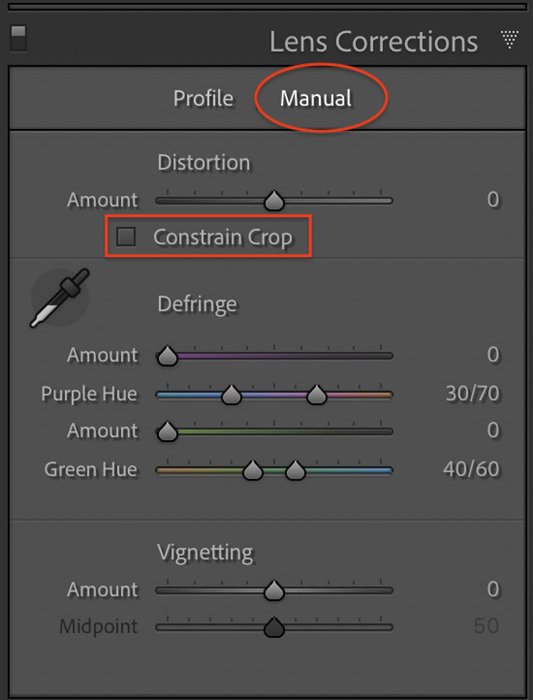
In Lightroom Classic, there is a second tab labeled Manual, where you can create a lens profile. The changes you make in Manual replace the lens profile correction. You can choose to start with lens profile correction applied or not. Camera Raw does not include the checkboxes found in Lightroom and Lightroom Classic. Distortion and vignetting are always adjusted manually.
Step 1: Select the Manual Tab
This gives you all the manual lens correction options.
Step 2: Correct Lens Distortion
Use the Distortion slider to straighten lines in your image. Moving it to the left corrects for barrel distortion. Moving it to the right corrects for pincushion distortion. If you see white space around your image, check the Constrain Crop box to crop out the empty spaces.
Step 3: Defringe Edges
Defringe lets you get rid of unnatural purple and green edges in your image. Use the Purple and Green Hue sliders to select a fringe color range. Move the Amount slider until the fringing disappears. You can also use the eyedropper tool. Clicking on a green or purple fringe applies a hue and sets the amount of color correction. The Defringe tab in Lightroom is like the Defringe options under the Manual tab in Lightroom.
Step 4: Correct Vignetting
The Vignetting slider fixes the dark edges of your frame. Slide the Vignetting slider to the left to darken the edges. Move it to the right to lighten. The Midpoint slider changes the size of the vignette. Slide to the left to make the midpoint smaller and increase the amount of vignetting. Move it to the right to increase the size of the midpoint and reduce the vignette.
How to Apply Lens Corrections on Import
You can save time doing lens corrections on every image when you import photos. We will start by editing one image and saving the settings as a preset.
Step 1: Edit One Image
Select an image and apply lens corrections. This is an opportunity to apply other favorite settings during import. Edit the selected image with the settings you want to apply to all photos.
Step 2: Create Preset
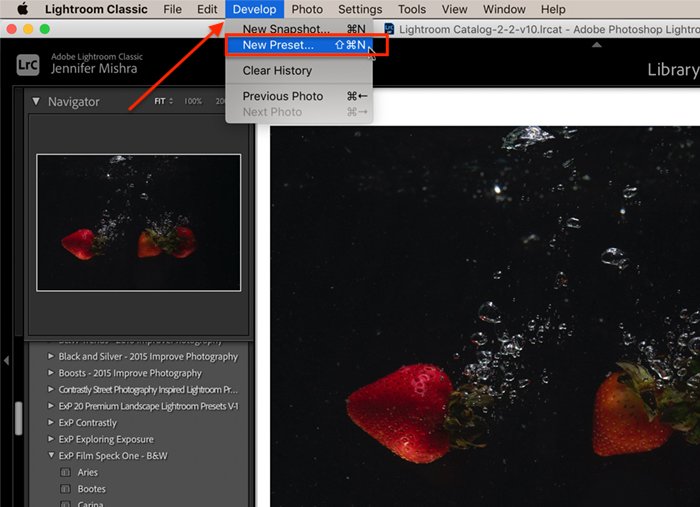
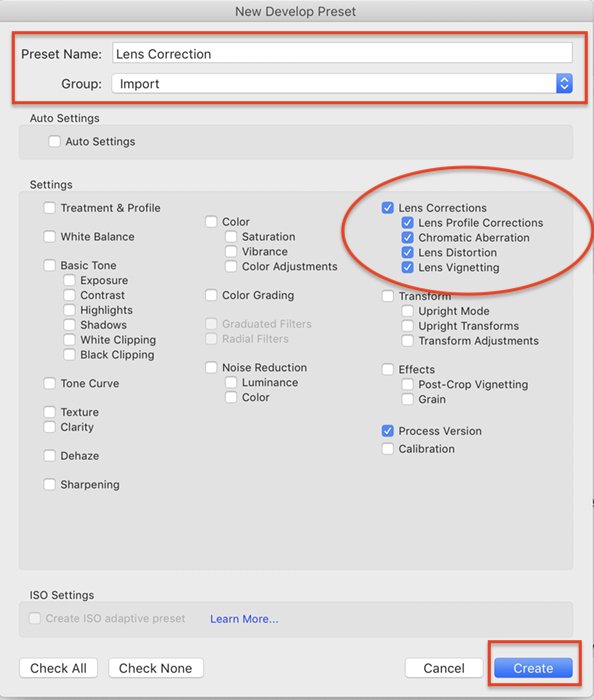
Go to the Develop drop-down menu and select Develop > New Preset. A list of settings appears. Click the box next to Lens Corrections. This will highlight the four individual lens correction settings. Click other boxes for the edits you want to apply to all images.
Name your preset so you can find it again. If you create a lot of presets, create a new group for import presets. Then click Create.
Step 3: Apply Preset During Import
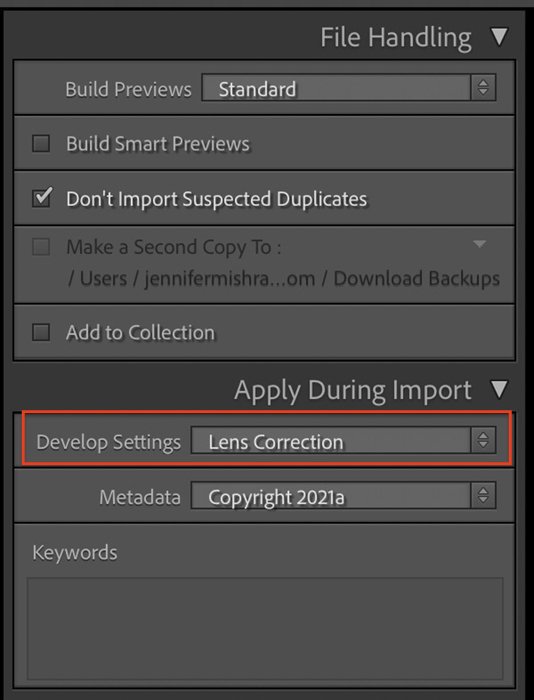
Click the Import button in the lower-left corner to open the Import workspace. In the right-hand column, find the Develop Settings under Apply During Import. Click the drop-down menu and select the import preset you created in Step 2. This will apply lens correction to all imported images.
How to Copy Lens Corrections
The import option is only available in Lightroom Classic. If you are using Lightroom or want to apply lens corrections after import, there is a quick way to copy lens corrections to many photos.
Step 1: Edit One Image
Select an image and apply lens corrections.
Step 2: Copy Settings
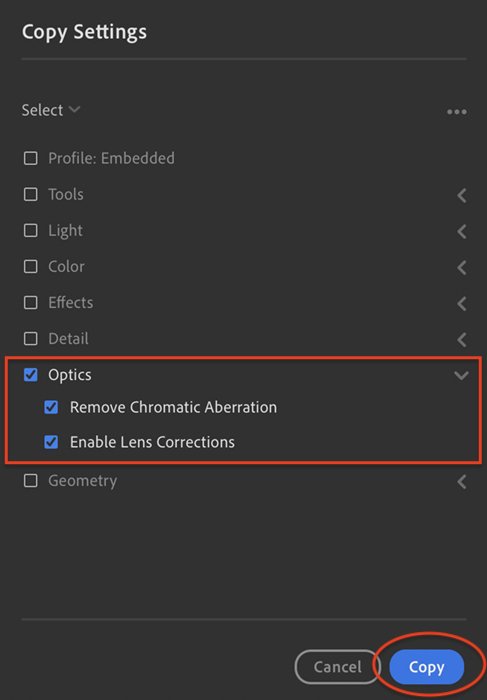
Open Grid view (shortcut G key). Hold the shift key and select the photos that need lens correction. Go to the Photo drop-down menu and select Photo > Paste Edit Settings. Then click Copy. Lightroom Classic’s copy command is Photo > Develop Settings > Copy Settings.
Step 3: Paste Settings
Hold the shift key and select the photos that need lens correction. Go to the Photo drop-down menu and select Photo > Paste Edit Settings. In Lightroom Classic, the paste settings command is Photo > Develop Settings > Paste Settings. This will apply lens correction to all selected images.
What Causes Distortion in Camera Lenses?
Every lens has different imperfections. These are created when the glass is ground and the lens is put together. Over the years, lens manufacturers have reduced a lot of the flaws. Post-processing programs like Lightroom can get rid of the rest. Common issues are optical distortions, chromatic aberration, and vignetting. Optical distortions make straight lines bow or curve. And every lens has slight optical distortion. Barrel and pincushion distortion are two of the most common in camera lenses. Barrel distortion often occurs with wide-angle lenses. Straight lines appear to curve like they are wrapping around a barrel. Telephoto lenses are most likely to have pincushion distortion. This is where straight lines seem to pinch inward from the center. Chromatic aberration happens when lenses have difficulty processing colors. Colors pass through the glass at different wavelengths. When the colors do not align on the same focal plane, the result is purple or green edges in parts of your image. This is called “color fringing” or “purple fringing.” You may see chromatic aberration at wide apertures and the edges of your frame. Lenses may darken the edges of your frame. This is called vignetting. Vignetting is caused by elements in your lens blocking light as it travels to your sensor. It is also created by light fall-off. The light on the edge of your frame travels further than the light in the center. You are more likely to see vignetting at wide apertures where the lens barrel blocks some of the light. The physics of lens distortion can be complicated. But you do not need to figure it out yourself. Manufacturers document distortions created by each lens. Adobe makes a lens profile correction to adjust for the distortions.
Should You Correct Lens Distortion?
You can choose to correct lens distortions or not. You may like the look created by your lens. For instance, lens distortion is the whole point of a fish-eye lens. You want to see the barrel distortion. And using a wide-angle lens and shooting close to your subject creates a humorous effect. We know what we see is not reality, but it is fun. For a realistic look, you should correct lens distortions. But you may like the effect of wide-angle distortions.
Conclusion
Lightroom lens correction is straightforward. Open the Lens Correction tool in the Lightroom Classic’s Develop module (Optics panel in Lightroom). Click the boxes to remove chromatic aberration and enable profile corrections. Lightroom uses metadata in your image to fix known distortions created by your lens. We hope this helps you improve the look of your photos!


