About PortraitPro 17
There are three levels of PortraitPro 17 – Basic, Studio, Studio Max. Basic is stand-alone only. This means it doesn’t communicate directly with other programs like Lightroom or Photoshop. The Studio and Studio Max versions can be used as plug-ins through Lightroom or Photoshop, but they come at a higher purchase price. Whether it’s worth it for you will depend on your editing process. The free trial gives you access to the Basic version, so you can get a clear idea of your needs then. Setup is simple and straightforward. For the sake of this review, we’ll be working with the basic version as a stand-alone program. Please note that, as portraits are not my usual genre and this is my first foray into using PortraitPro 17, I used a trial version for this review. Since it’s a trial version, you’ll see a watermark on the “After” photos. Please disregard this watermark since it’s not there beyond the trial period. One restriction that you instantly see when working with the Basic version is that it only works with JPEG or TIFF file types. The others can work with RAW. If you’re shooting professionally then you’re most likely shooting in RAW. This is important to be aware of when choosing which version of PortraitPro 17 to work with.
Getting Started
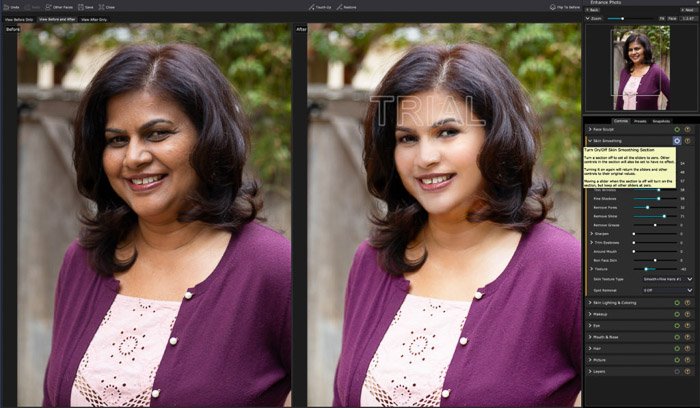
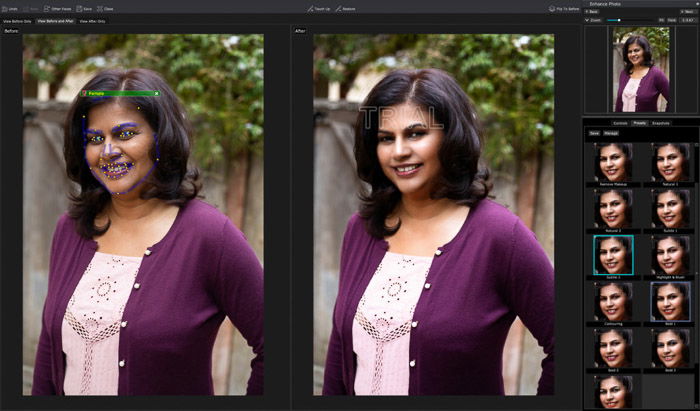
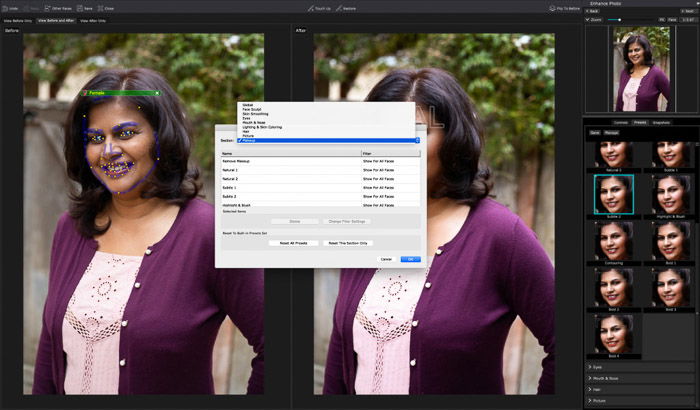
When you first open PortraitPro 17, you’ll be able to open a photo to work with. Upon opening the photo, PortraitPro 17 will automatically use face detection to find the eyes, nose, lips, and edges of the face. If the program isn’t certain about whether it’s a female, male, girl, or boy, it will prompt you to choose. Once the face is detected, it will apply an automatic edit to the subject. You can then tweak these to your preference. The program uses the facial features it detected as a guide. You don’t have to worry about selecting, masking, or brushing a selection to select each facial feature. In this way, PortraitPro 17 saves you loads of time! You also have the option of turning off the automatic face detection and doing the adjustments manually. But I found that the automatic selection is actually quite accurate. Once face features are selected and automatically edited, you can adjust all edits manually. I was impressed with the variety of adjustments you can make! There are presets built into the program that are for different styles of editing. These presets are categorized, depending on what they adjust. You have options of presets that apply to the entire photo style, some that are for different styles of face editing, and some that are specifically for hair, eyes, make-up, face sculpt. Beyond the presets, you can manually adjust anything. This includes things like lighting, eyes, skin smoothing, hair, layers (where you can add a new background). With so many adjustment possibilities, it is a bit overwhelming at first. Let’s go over a few noteworthy sections.
Noteworthy Photo-Editing Tools
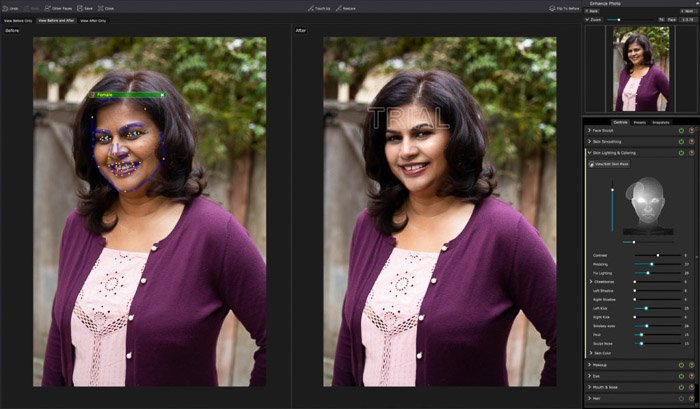
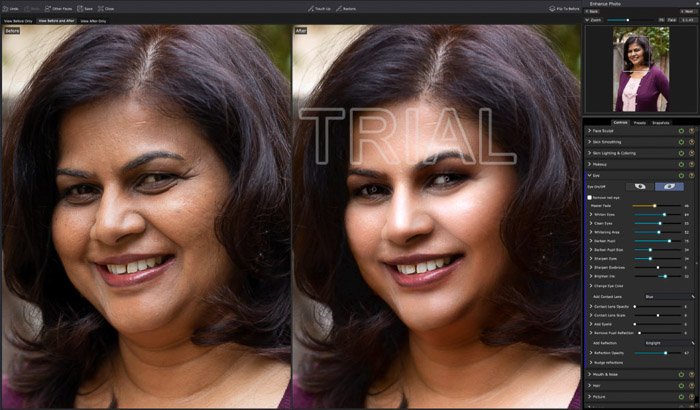
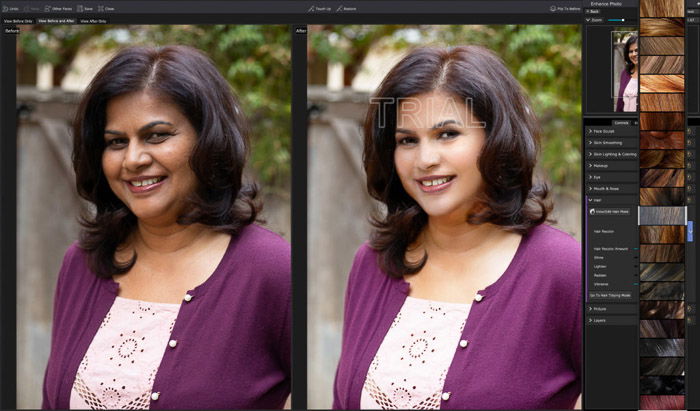
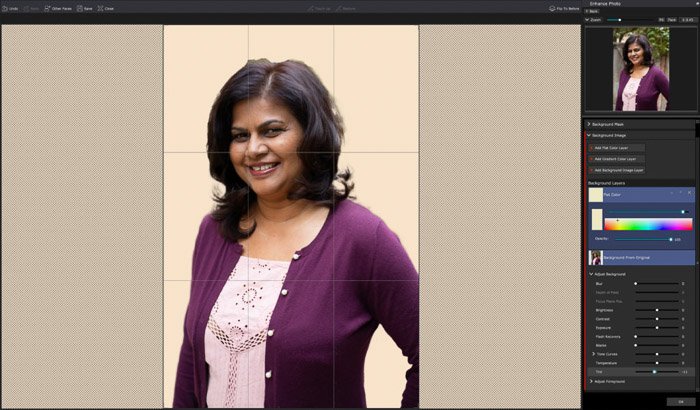
The Face Sculpt section is perfect for small tweaks to facial features that your client may be self-conscious about. You can do things like slimming the face, adding volume to the hair, opening up the eyes a bit, or lengthening the neck. All of these come with sliders. The photo editing software also has batch processing capabilities. As you slide to either end of the slider track, you can see the changes made on the photo. The Skin Lighting and Coloring section is fantastic for adjusting lighting when it wasn’t just right during the shoot. You can click and drag where you want the direction of the light to hit your subject. And then you can adjust how it hits each part of the face. It also includes some sliders for coloring adjustments, such as smoky eyes and pout color. The Eye section is also fantastic because so much of the focus of a portrait is on your subject’s eyes! You can do standard adjustments like whitening eyes, brightening irises, or darkening pupils. And you can also do more advanced retouching like changing eye color and adding in reflections (such as a ringlight, as seen in the example photo above). I found the variety of adjustments and the level of control of each element to be much more than expected! The Hair section is a great way to change hair color and clean up stray hairs quickly and easily. You can choose from a menu of hair colors, adjust the mask used for hair selection, and manually adjust things like shine, redness, and vibrance. The Hair Tidying mode is great for smoothing out the hair and making it look a bit more cleaned up. The only downside is that the edges of the hair mask are not super clean and detailed. This becomes a bit more obvious when you move into the next section we’ll talk about – Layers. The Layers section is where you can swap out the background for something different. This tool is incredibly easy to use, but it suffers a bit in selecting a clean, detailed edge around the hair. PortraitPro 17 automatically will select what it thinks are the foreground and background, and then you can adjust the mask as needed. I found the brush for selection to be bulky and it didn’t give enough control for detailed edging. But it’s good for photos where you can relatively clean edges to work with. When you swap out the background, you can do a solid, a gradient, or you can bring in your own photo for the background. One final feature that I feel is important to mention is the ability to create snapshots. This is fantastic for trying different versions of the same photo. You can play with how much or how little you want to edit, and what different features will do in comparison to others. Saving each one as a snapshot is similar to snapshots in Lightroom in that you can then click on it to return to that version instantly.
The Cons of PortraitPro 17
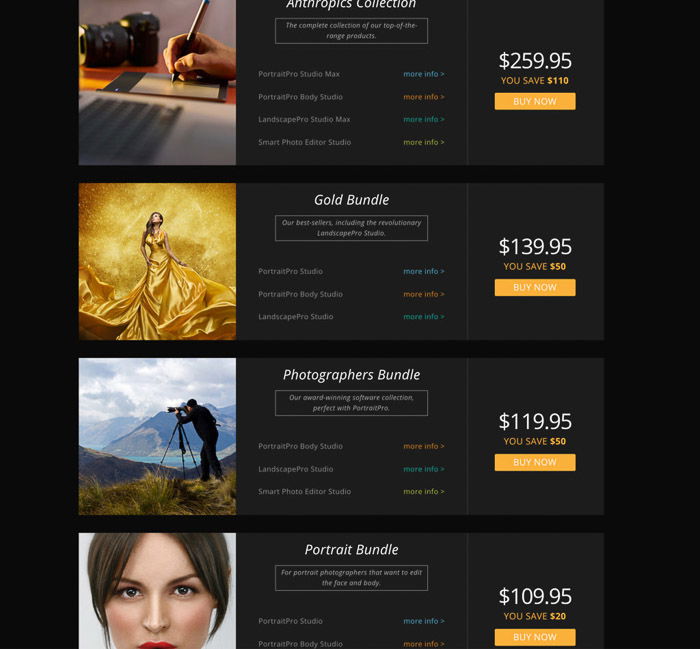
One thing I found lacking is the ability to reset. You can turn each control section off and on individually. But there is no button to reset the image if you want to start over from scratch. Especially when playing with different editing options and deciding what works best, this would have been a vital tool. As a beginner with this program, I found it frustrating that I couldn’t reset the entire image and then begin fresh with adjustments. You can save the unedited version at the beginning as a snapshot on its own though. Or you can close the photo and then re-open to start once more. Note that the trial version is great for getting to know its features. But it does not allow you to save any of your work. It’s also worth noting that Anthropics, the creators of PortraitPro17, have multiple products for different types of edits. PortraitPro 17 is specifically for facial touch ups. If you’re looking for full-body retouching, a general retouching program, or one specifically for landscape, you’ll need to use a different program. Fortunately, there are bundle prices currently starting at $110. It’s still a worthwhile investment if you do a lot of portrait work. This program does make retouching quite easy and quick. But it also makes it easy to take the editing too far. In the examples shown above, for example, edits are a bit more extreme. This was done for the sake of showing the editing features in this review. We each have our own style of editing. But the edits recommended by PortraitPro 17 tend to lean too far to a glam look best left for fashion shoots. For portraits of everyday folks, you will need to practice a fair amount of editing restraint.
Conclusion
Overall, PortraitPro 17 is impressive. If you’re shooting professionally, using the Studio or StudioMax versions is worth considering. That way, you can work directly with RAW files and use as a plug-in together with Lightroom or Photoshop. Aside from improvements to brush selection on foreground/background, hair selection for detail, and a reset button, PortraitPro 17 leaves little room for complaint. If portraits are your main genre of photography, I would highly recommend getting PortrairPro17 for quick retouching with loads of adjustment options. If you do weddings or couples photography, consider the portrait bundle so that you do have the ability to do full-body retouching.
