50mm f/1.8: The Right Lens for Your Camera
You actually have three choices depending on which camera you have. If your camera has an autofocus motor, you can buy the Nikon 50mm f/1.8D AF. The following Nikon cameras don’t have one:
Nikon D40 Nikon D40X Nikon D60 Nikon D3000 Nikon D3100 Nikon D5000 Nikon D5100.
If you have one of the cameras mentioned, your camera body doesn’t have an autofocus motor built in; you have to buy a lens that does – marked with an ‘AF-S’. Unfortunately for you, this is more expensive: the Nikon 50mm f/1.8G AF-S. Now, regardless of whether or not you have an autofocus motor, you can buy the 35mm f/1.8, which will provide a better viewing angle on a crop sensor (you’re likely to be shooting on one of these) – Nikon 35mm f/1.8G AF-S.
General Review
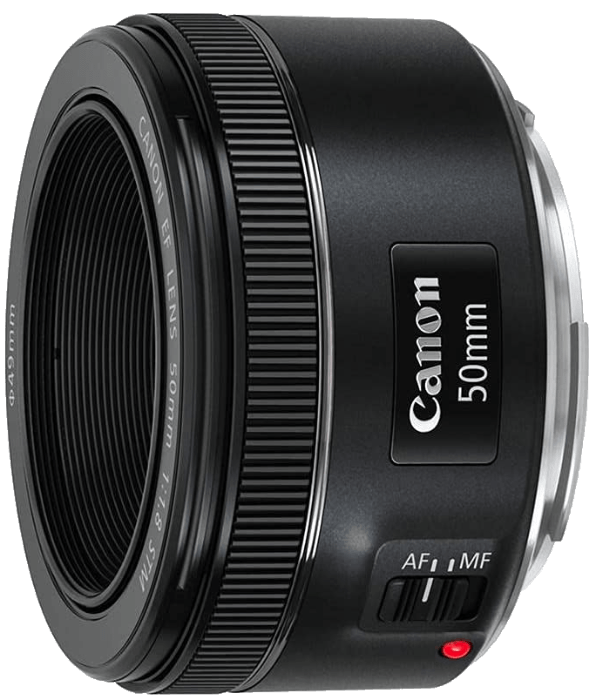
There are advantages of buying more expensive lenses, such as the Nikon ones listed above, as they have better build quality. Before I upgraded, I used my 50mm regularly – extensive usage like this takes its toll on the plastic build (glass inside) and toy-like features. The lenses are very light and small; ideal if you’re looking to upgrade from your kit lens but don’t want to carry around a load of extra weight. It’s true that you get what you pay for but, for a couple hundred bucks, you can produce some astounding results from these lenses. The optics on prime lenses (no zoom) are usually much better quality; they’re not making as many compromises. With this, the price comes down, hence I endorse them so much. Having used both the Canon and the Nikon, I can tell you that the focus does tend to suck on these lenses; they’re slow and inconsistent. The small focus ring on each lens doesn’t help much with manual focus either and the focus tends to be quite loud – watch out for that if you shoot video regularly. That being said, I’m looking back on these lenses after being used to using much more expensive lenses; my judgment has changed somewhat. You may not notice so much of a difference if you’re using cheaper lenses to begin with. Because of the crop factor on these lenses, the Canon feels more like an 80mm lens, the Nikon 50mm is more like a 75mm lens and the Nikon 35 looks like a 52.50mm lens. If you do choose a 50mm lens and you’re shooting on a crop sensor, expect everything to be quite zoomed and remember, this isn’t necessarily a bad thing. They make ideal cheap portrait lenses in terms of focal length but expect to have to move back if someone asks for a group shot. If you’ve been reading this blog for a while, you should have expert knowledge about how perspective changes at different focal lengths. As I mentioned in my post on the crop factor however, putting your full frame lens on a crop sensor body will not change the perspective – only crop it. This is a good thing because the way we see through our own eyes is generally considered to be similar to about 45mm; by using a 50mm you’re quite accurately representing our natural view without compressing the perspective too much. There are obvious downsides to cheaper lenses but don’t be put off. Once you’ve put a 50mm f/1.8 on your camera, you’re not going to want to take it off – I know I didn’t. It’s a tool for every photographer’s arsenal and I personally don’t know anyone who has regretted the purchase. Enough of telling you why it’s so great, let me show you…
The Lens Guide
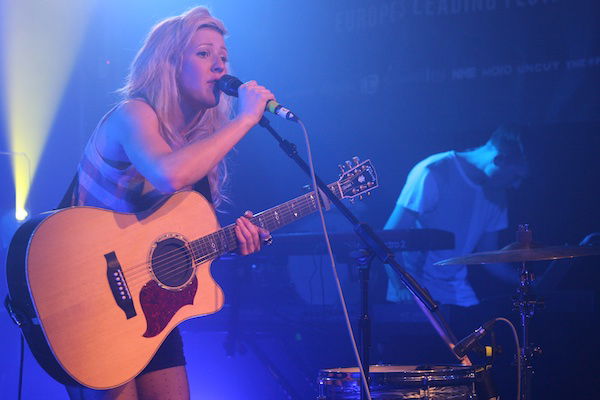
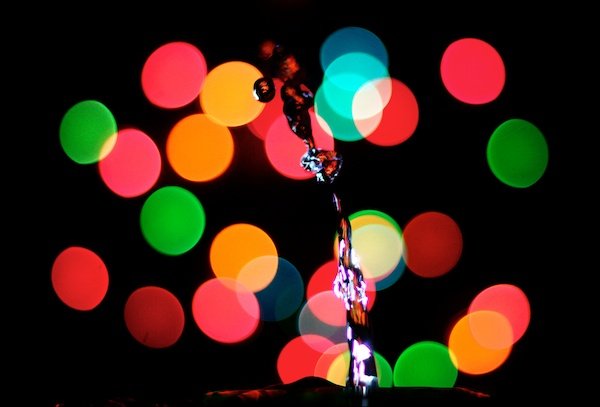
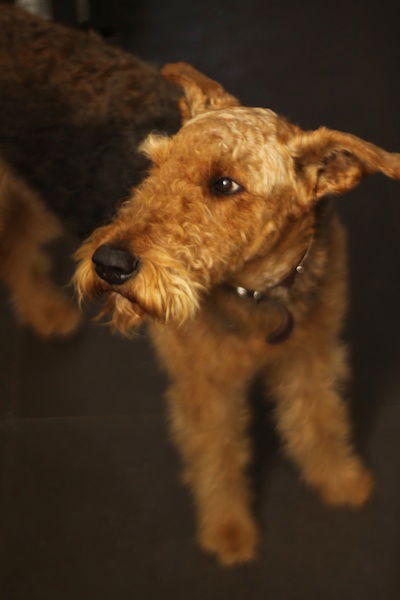
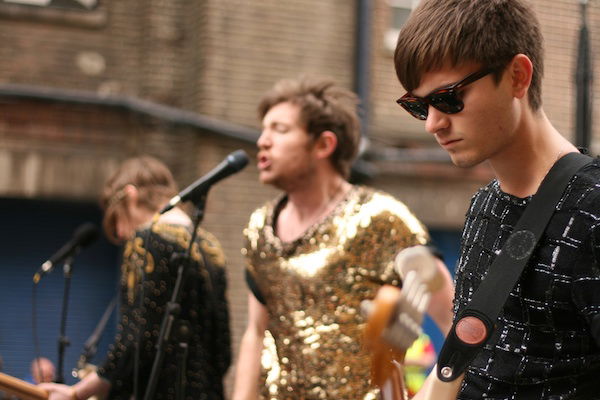
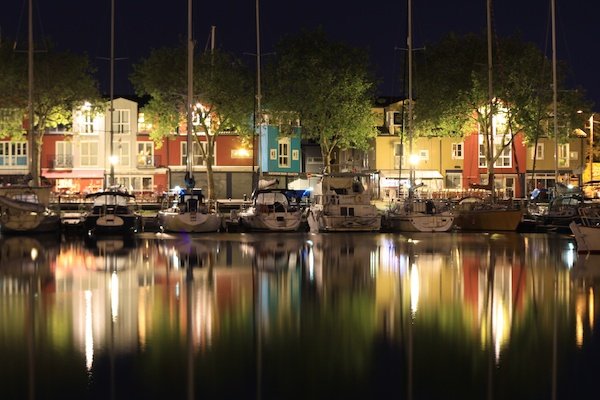
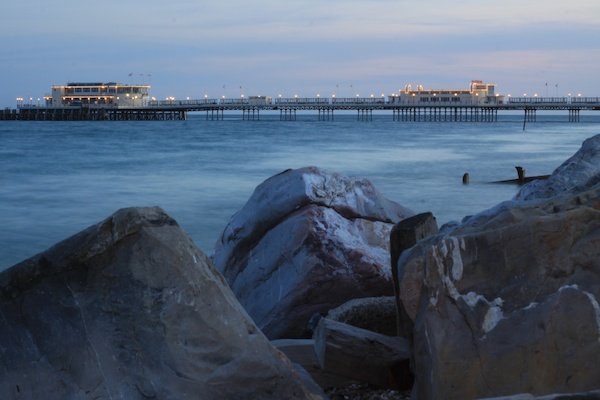
The very first thing you’ll notice about your new lens is the ability to shoot in much lower light without having to use the flash. This is because of the wider aperture which allows more light in. If you don’t know your aperture scale, I suggest learning it. For now, let me tell you that if your lens went as wide as f/3.5 before, it now lets in four times as much light at f.1.8. When I say wide, I’m talking about the size of the hole in the lens that the light passes through. The photo below was taken indoors in a dark room at f/1.8 for 1.200 of a second at ISO 100. The next thing you’ll notice is that the depth of field (DoF) can go remarkably shallow. This is because of the way the light passes through the lens at a wider aperture. The wider the aperture, the shallower the depth of field. This can be used for creative effect – it works really well. A common problem with people who get a 1.8 is that they think it looks so good that it’s all they ever use; use it sparingly or it’ll lose its appeal. Notice from the photo below that the glasses on the face are in focus but the end of the hat and chin are out of focus. This was also shot at f/1.8. In the photo above, you may notice the circular shapes of color in the background – this is what’s referred to as Bokeh. Simply put, it’s the aesthetic quality of out-of-focus areas of a photograph. Bokeh relates to how nice the background blur looks when out-of-focus. When you’re shooting at wider apertures, the effect of the bokeh is accentuated; it will look a lot more prominent than anything you would have seen with your kit lens. Because this is a cheap lens, made to a price, it’s not the highest quality (which you may see from the photo above) but, if you use it properly with distant light, you can produce some really nice effects. Again, the photo below was shot at f/1.8. Selective focus with an f/1.8 is something that you may not have much experience with. Because the depth of field can be made to look so shallow, it’s even more effective with this lens. You can focus the viewer’s attention onto a certain part of the photo, making them want to explore the rest at the same time. It’s a powerful technique but, like everything, remember not to overdo it.When you’re shooting wide open, you’re going to produce some very soft photos. If you want these to be sharper, you need to narrow your aperture a fair bit. I find around f/8 to be the sharpest point on my Canon 50mm f/1.8. The photo below was shot at f/7.1 and manages to keep the whole of the subject in focus while making sure plenty of detail remained in the background – you can make out the burnt down pier. Experiment with wide apertures at first but you may find that narrower ones suit your style a lot better. As I mentioned earlier, the crop factor does make this lens appear more zoomed than you may want it to be. That can’t really be helped unless you opt for the 35mm – it’s really a matter of personal preference and budget. It’s all about working with the gear you have at your disposal. When I took the photo below, I had no tripod on me, just my 50mm lens. Because I knew what effect this would have on my photos, I found a position that would work for me rather than simply giving up; I would usually have shot this photo with a wider angle. I found a position on a dock further away and shot this photo at f/4.5 for 8 seconds – I was very happy with how it came out. I’ve spoken a lot about f/1.8 but the lens aperture will go as narrow as f/22, which is fairly common. This will give you a much deeper DoF so that you can have your background and foreground in focus. The photo below was shot at f/22 for 4 seconds. As you can see, the deep foreground is in good focus and you can still work out all the minor details in the background on the pier. It’s important to remember that this lens does have more uses than just low light photography or shallow depth of field. Finally, as you start to collect more gear, you can use it to make your photos look even better. A 50mm lens is great but, when you use it in conjunction with an external flash unit (and off camera transmitter for the photo below), you’ll get even better results. Like I said before, it’s about working with what you’ve got – when you have a little bit more, it can become a lot easier (when you know what you’re doing) to get better shots.








title: “The 50Mm F 1 8 Lens Review Guide” ShowToc: true date: “2023-02-02” author: “Beverly Redick”
50mm f/1.8: The Right Lens for Your Camera
You actually have three choices depending on which camera you have. If your camera has an autofocus motor, you can buy the Nikon 50mm f/1.8D AF. The following Nikon cameras don’t have one:
Nikon D40 Nikon D40X Nikon D60 Nikon D3000 Nikon D3100 Nikon D5000 Nikon D5100.
If you have one of the cameras mentioned, your camera body doesn’t have an autofocus motor built in; you have to buy a lens that does – marked with an ‘AF-S’. Unfortunately for you, this is more expensive: the Nikon 50mm f/1.8G AF-S. Now, regardless of whether or not you have an autofocus motor, you can buy the 35mm f/1.8, which will provide a better viewing angle on a crop sensor (you’re likely to be shooting on one of these) – Nikon 35mm f/1.8G AF-S.
General Review
There are advantages of buying more expensive lenses, such as the Nikon ones listed above, as they have better build quality. Before I upgraded, I used my 50mm regularly – extensive usage like this takes its toll on the plastic build (glass inside) and toy-like features. The lenses are very light and small; ideal if you’re looking to upgrade from your kit lens but don’t want to carry around a load of extra weight. It’s true that you get what you pay for but, for a couple hundred bucks, you can produce some astounding results from these lenses. The optics on prime lenses (no zoom) are usually much better quality; they’re not making as many compromises. With this, the price comes down, hence I endorse them so much. Having used both the Canon and the Nikon, I can tell you that the focus does tend to suck on these lenses; they’re slow and inconsistent. The small focus ring on each lens doesn’t help much with manual focus either and the focus tends to be quite loud – watch out for that if you shoot video regularly. That being said, I’m looking back on these lenses after being used to using much more expensive lenses; my judgment has changed somewhat. You may not notice so much of a difference if you’re using cheaper lenses to begin with. Because of the crop factor on these lenses, the Canon feels more like an 80mm lens, the Nikon 50mm is more like a 75mm lens and the Nikon 35 looks like a 52.50mm lens. If you do choose a 50mm lens and you’re shooting on a crop sensor, expect everything to be quite zoomed and remember, this isn’t necessarily a bad thing. They make ideal cheap portrait lenses in terms of focal length but expect to have to move back if someone asks for a group shot. If you’ve been reading this blog for a while, you should have expert knowledge about how perspective changes at different focal lengths. As I mentioned in my post on the crop factor however, putting your full frame lens on a crop sensor body will not change the perspective – only crop it. This is a good thing because the way we see through our own eyes is generally considered to be similar to about 45mm; by using a 50mm you’re quite accurately representing our natural view without compressing the perspective too much. There are obvious downsides to cheaper lenses but don’t be put off. Once you’ve put a 50mm f/1.8 on your camera, you’re not going to want to take it off – I know I didn’t. It’s a tool for every photographer’s arsenal and I personally don’t know anyone who has regretted the purchase. Enough of telling you why it’s so great, let me show you…
The Lens Guide
The very first thing you’ll notice about your new lens is the ability to shoot in much lower light without having to use the flash. This is because of the wider aperture which allows more light in. If you don’t know your aperture scale, I suggest learning it. For now, let me tell you that if your lens went as wide as f/3.5 before, it now lets in four times as much light at f.1.8. When I say wide, I’m talking about the size of the hole in the lens that the light passes through. The photo below was taken indoors in a dark room at f/1.8 for 1.200 of a second at ISO 100. The next thing you’ll notice is that the depth of field (DoF) can go remarkably shallow. This is because of the way the light passes through the lens at a wider aperture. The wider the aperture, the shallower the depth of field. This can be used for creative effect – it works really well. A common problem with people who get a 1.8 is that they think it looks so good that it’s all they ever use; use it sparingly or it’ll lose its appeal. Notice from the photo below that the glasses on the face are in focus but the end of the hat and chin are out of focus. This was also shot at f/1.8. In the photo above, you may notice the circular shapes of color in the background – this is what’s referred to as Bokeh. Simply put, it’s the aesthetic quality of out-of-focus areas of a photograph. Bokeh relates to how nice the background blur looks when out-of-focus. When you’re shooting at wider apertures, the effect of the bokeh is accentuated; it will look a lot more prominent than anything you would have seen with your kit lens. Because this is a cheap lens, made to a price, it’s not the highest quality (which you may see from the photo above) but, if you use it properly with distant light, you can produce some really nice effects. Again, the photo below was shot at f/1.8. Selective focus with an f/1.8 is something that you may not have much experience with. Because the depth of field can be made to look so shallow, it’s even more effective with this lens. You can focus the viewer’s attention onto a certain part of the photo, making them want to explore the rest at the same time. It’s a powerful technique but, like everything, remember not to overdo it.When you’re shooting wide open, you’re going to produce some very soft photos. If you want these to be sharper, you need to narrow your aperture a fair bit. I find around f/8 to be the sharpest point on my Canon 50mm f/1.8. The photo below was shot at f/7.1 and manages to keep the whole of the subject in focus while making sure plenty of detail remained in the background – you can make out the burnt down pier. Experiment with wide apertures at first but you may find that narrower ones suit your style a lot better. As I mentioned earlier, the crop factor does make this lens appear more zoomed than you may want it to be. That can’t really be helped unless you opt for the 35mm – it’s really a matter of personal preference and budget. It’s all about working with the gear you have at your disposal. When I took the photo below, I had no tripod on me, just my 50mm lens. Because I knew what effect this would have on my photos, I found a position that would work for me rather than simply giving up; I would usually have shot this photo with a wider angle. I found a position on a dock further away and shot this photo at f/4.5 for 8 seconds – I was very happy with how it came out. I’ve spoken a lot about f/1.8 but the lens aperture will go as narrow as f/22, which is fairly common. This will give you a much deeper DoF so that you can have your background and foreground in focus. The photo below was shot at f/22 for 4 seconds. As you can see, the deep foreground is in good focus and you can still work out all the minor details in the background on the pier. It’s important to remember that this lens does have more uses than just low light photography or shallow depth of field. Finally, as you start to collect more gear, you can use it to make your photos look even better. A 50mm lens is great but, when you use it in conjunction with an external flash unit (and off camera transmitter for the photo below), you’ll get even better results. Like I said before, it’s about working with what you’ve got – when you have a little bit more, it can become a lot easier (when you know what you’re doing) to get better shots.


