[ExpertPhotography is supported by readers. Product links on ExpertPhotography are referral links. If you use one of these and buy something, we make a little bit of money. Need more info? See how it all works here.]
Filters for Landscape Photography: Understanding the Quality of Light as a Make-or-Break Factor
Part of the experience that separates the beginner from the expert lies in the ability to assess the quality of natural light in the landscape scene. Amateur photographers often have difficulty in telling what ‘good light’ is. And they don’t have a great sense for how it can be improved. Honestly, this is something that takes a lot of practice to develop. But it’s also our starting point for talking about filters. Even the most picturesque landscape can be ruined by bad light. But good light has the power to make an otherwise boring landscape pop. The truth is, when shooting landscapes, natural light isn’t always great. That’s where filters come in. Studio photographers may be used to creating their own artificial lighting magic by using a variety of equipment and patterns. Landscape photographers, however, have filters to squeeze the best out of natural light. The three most commonly used filters for landscape photography are:
graduated neutral density filters (GND) neutral density filters (ND) circular polarisers (CPL)
Less common filters are: infrared filters (IR) and light pollution reduction filters (LPR). Read on to learn all about these different kinds of filters. I will share some tips on how to use them in the field. Then I’ll give you a few useful accessories to use alongside them. Where possible, I will also tell you how to fake and/or improve the effects of a specific filter in post-processing.
Filter Formats
Filters come in two main different formats:
Threaded round filters, which are the most common among amateurs. Threaded round filters (also called screw-in filters). Square/rectangular filters used with specific holders, loved by enthusiast and professional landscape photographers. Rectangular GND filters.
The main advantage in using square/rectangular filters is that GND filters, a ‘must have’ in landscape photography, are available mostly in this format. Although some threaded round GND filters exist, their clear/dark transition is always placed in the middle of the frame. These also make it easy and cheap to work with lenses with different diameters. Threaded round filters are less prone to light leaks when doing daytime long exposures and are lighter. This is particularly important if you want to attach a filter to a compact camera with a retractable lens, such as the Sony RX100 cameras.
Buying Your Filters: The Good Brands
Filters can be made of different materials, from simple glass to resin and optical glass with anti-reflective coating. These are the most expensive. In theory, they also introduce less color cast and other artifacts. I advise against using low-quality filters. These will surely decrease image quality and defeat the purpose of buying expensive, pro-grade, lenses. There are countless brands on the market when it comes to filters. Generally, however, brands can be categorized as follows:
Pro/Enthusiast: Lee, Ray Master, Kase, B+W, Formatt-Hitech, Hoya Amateur: Cokin, Kenko, Tiffen, Polaroid
Note that not all brands offer both threaded round filters and square/rectangular filters. Do your research before you buy to see what fits your needs best. Our review of best polarizing filters can also help you make a choice. A good starter kit for landscape photography can be quite pricey but you’ll likely be using them for life. If you are an avid landscape photographer consider making the investment, rather than wasting money on cheap filters.
Stacking Multiple Filters Together
Both round and square/rectangular filters can be stacked together in different combination to obtain different effects. For example, you can stack:
more ND filters to enable a longer exposure time a CPL and a GND filter to remove reflections in water while balancing the exposure across the scene multiple GND filters to better balance the exposure across the scene
There are endless combinations but as a rule of thumb, you should only stack high quality filters, so as to minimise unwanted color casts, banding, flares, and reflections.
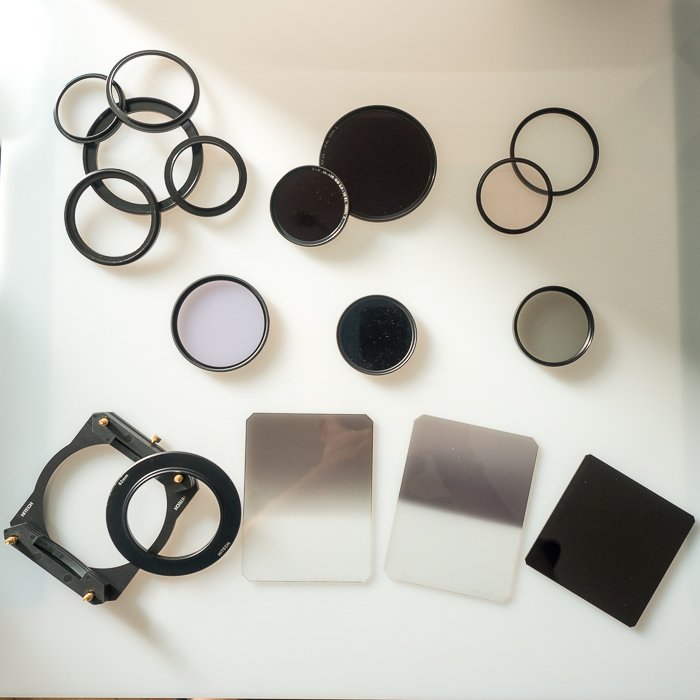
Must Have Accessories for Filters
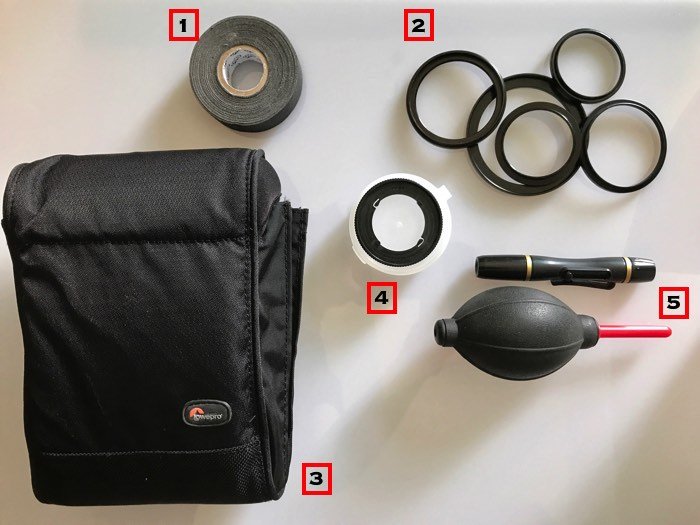
When working with filters there are a few essential accessories you should consider. These are:
Step up/ step down adaptor rings: These allow you to use a round threaded filter on lens of different diameter. Holder adaptor rings: These allow you to mount the holder for squared/rectangular filter on different lenses. Brush, blower and cleaning kits: Filters can get dirt easily when you manipulate them and their case can deposit on them dust and/or particles from the padding material used. Filter wrench: Sometimes filters and adaptor rings can get stuck in the lens thread and a filter wrench will allow you to easily and safely remove them from your lenses. Filter pouch: This allows you to have all your filters ready in one place. Filter pouches are available for round and square/rectangular filters. Black gaffer tape: This helps seal filters and lenses to prevent light leaks during daytime long exposures and more. It does not leave glue on your gear. Filter adaptors for compact cameras: For some high end compact cameras, such as the Sony RX100 line, both official adaptors and generic third-party mounting systems such as magfilter and Lensmate exist to allow you to mount standard threaded round filters, usually 52 mm in diameter.
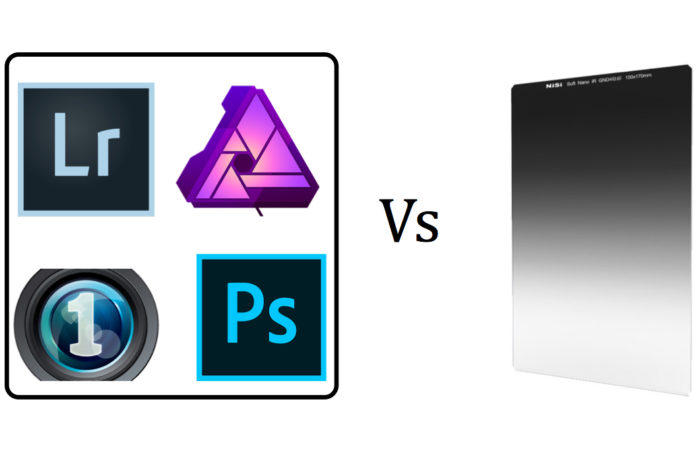
Physical Filters vs. Digital Filters
As good filters are expensive and because editing software are getting more and more affordable, flexible, easy to use, and powerful, one could be temped to shoot without filters and apply them digitally afterwards. The main difference between a physical and a digital filter is that while a real filter manipulates light before it hits the sensor, a digital one manipulates the data recorded by the sensor. How well the editing can substitute for a real filter will depend on the kind of filter, the image, clipped highlights or blacks (check the histogram after you take your photos), your editing skills, and how you feel toward landscape photography. Purists tend to work to ‘get it right’ in camera. Note than you should always shoot in RAW format for the best results.
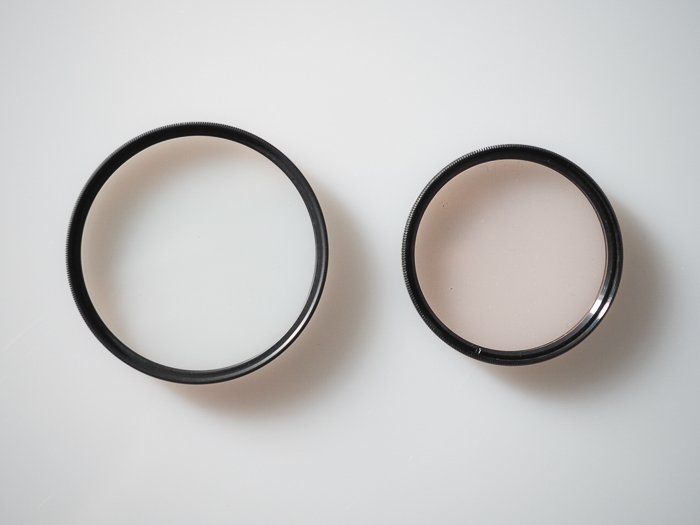
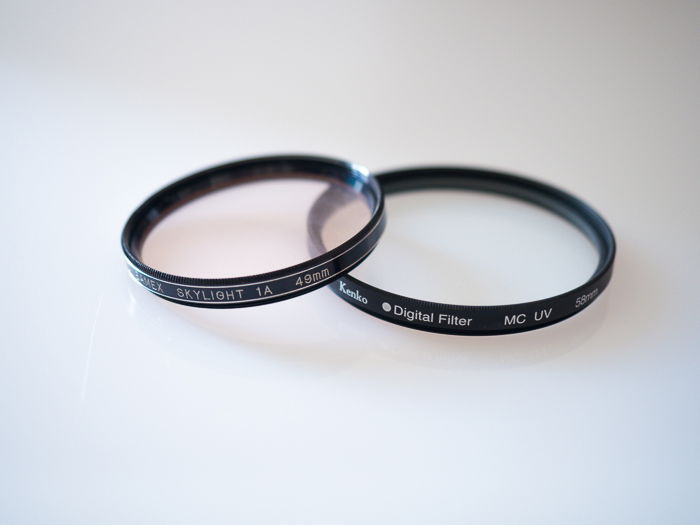
Clear, Skylight and UV Filters
There is a bit of a debate about the merits of these types of filters. They undoubtedly provide protection for front element of your precious lens, but some believe they reduce image quality slightly, while others say that they boost image clarity. I personally use a UV filter for protection when shooting in the wild. Skylight filters were used to warm up the colors and are popular among film landscape photographers. Nowadays, provided you shoot in RAW, editing software can do the job of these filters. Check out this video from photographer Phil Steele about the role of these filters in today’s photography:
Graduated Neutral Density Filters
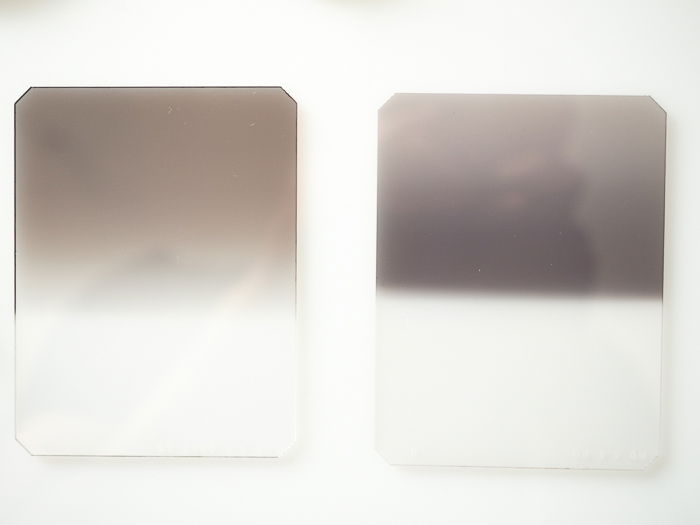
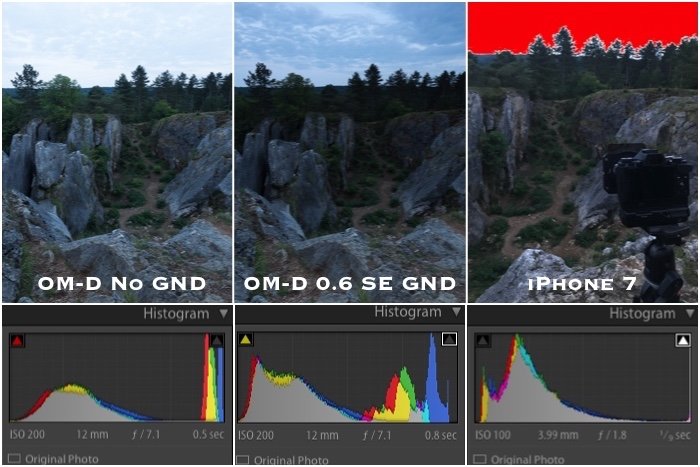
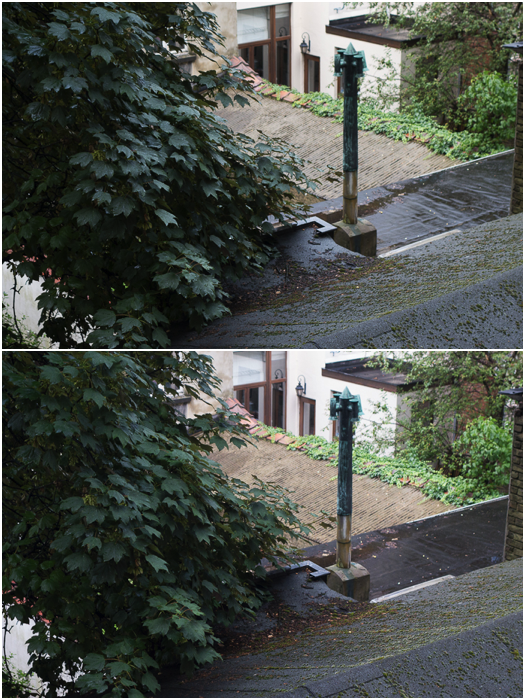
Graduated neutral density filters, GND, are ‘must have’ filters for landscape photography. They are needed to balance the exposure between a bright sky and a rather dark foreground. This is a typical situation when shooting landscapes during the so called blue and golden hours. The image below compares the same scene photographed using my Olympus OM-D EM-5 Mk II with no filter (left) and with a 0.6 (2 stop) Soft Edge GND (center). On the right, the behind-the-scenes shot from my iPhone 7. The corresponding histograms are shown below each unedited image. You can see that the iPhone, because of its more limited dynamic range, has completely blown out the sky. See the red warning for clipped highlights. Without a filter (but with good dynamic range), my Olympus hasn’t completely blown out the highlights. Most of the sky could be (barely) recovered. The more balanced histogram is that of the central one. This is where I used the GND filter. Aside from evening up the exposure across the scene, darkening the sky allows for increased exposure time, which helps saturate the colors in the image. GND filters are available most commonly in rectangular format. They come in different strength. And they have different ‘darkening patterns’ to match all possible situations.
Soft and hard edges: in these filters the bottom part is clear while the upper one increasingly darkens from the center to the edge of the filter. The central transition between the two areas is gradual in soft edge filter and more sudden in the hard edge filters. It is a general purpose filter used to balance sky and ground. Reverse filters: in these filters the bottom part is clear, the upper is dark but it brightens up moving from the center of the filter toward the upper edge. This particular filter is useful when the sun is quite low above the horizon (or just below), which is therefore brighter than the sky above. Horizon filters: in these filters the darker part if placed at the center of the filter and it fades towards the bottom and upper edges of the filter. The filter is used when the sun is at the horizon.
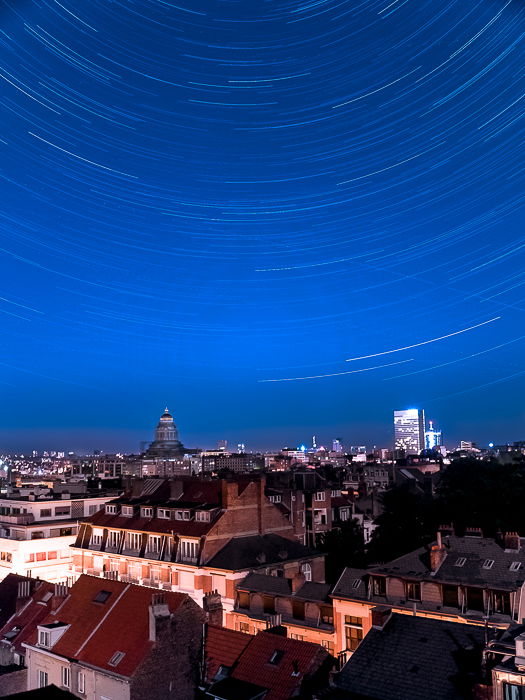
A less trivial use of GND filters is when doing nocturnal cityscapes and star trails above the city. In this case the filters are used ‘upside down’ to balance the bright city with the darker sky above.
In the Field
Usually, landscape photographers plan their shot beforehand. You should have plenty of time to set up your gear. This is so you can capture that magical light you were after. Observe the scene to determine where the brightest part is. This will help you chose the proper kind of GND. Comparing the spot light reading for the foreground with that for the sky will give you a clue on how strong your GND needs to be to balance the sky and the foreground. Slide the filter up and down in the holder slot to place the clear/dark transition in the right position. This will allow you to best balance the brightness of the scene. You can rotate the holder on the lens if you don’t have a flat horizon or dark/bright transition in the scene.
The Digital GND Filter
Do you own a Sony RX100 Mark 3/4/5 high-end pocketable camera? Then you’ll be happy to know that Sony has released an app in the PlayMemories store that allows you to use an in-camera GND filter. For the rest of us, we can reproduce the effect of a GND filter in two ways. This is provided you have not clipped your histogram. You can either use selective adjustment in your editing software or shoot for HDR.
Selective Adjustments
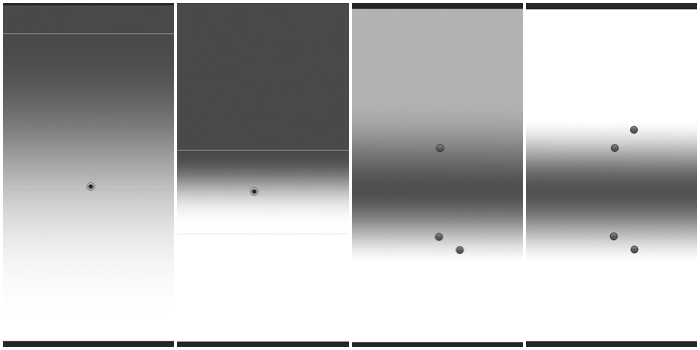
Lightroom has a selective adjustment tool called graduated filter. This works exactly like a GND filter. In the image below I used the filter on a white background. This shows you that it is possible to simulate all the different patterns of the real filters. Digital filters are more flexible than real ones. You can manipulate the filter in more ways than just reducing the brightness. You can also reduce highlight, boost contrast, fix white balance for the sky, etc. And they make it easier to deal with a complex horizon, trees, mountains or other dark features.
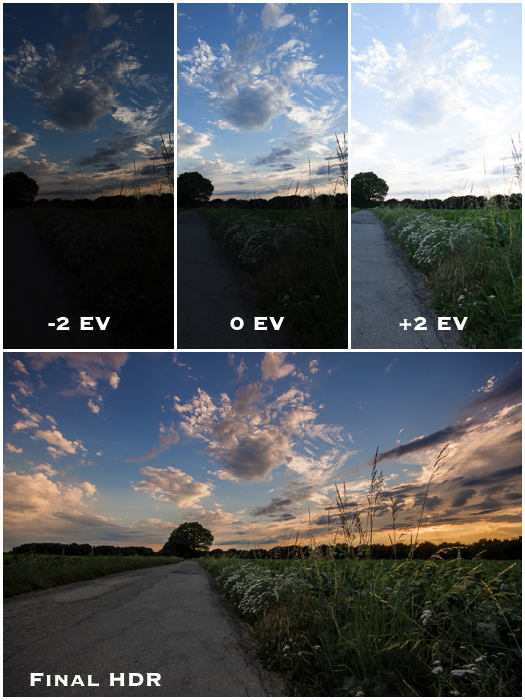
Shooting For HDR
HDR stands for High Dynamic Range. This is a technique used to extend your camera’s dynamic range by combining different photos of the same scene taken at different exposures (e.g. at -2Ev, 0 EV, and +2 EV). This allows you to get separated good exposures of different areas in the image. And then, with specific software, you can create the final image. Beware that it is easy to overdo an HDR image. For this reason, the HDR technique is somewhat controversial among purists. Way too many bad HDR images have flooded the internet. Also, beware of moving objects. These can create ‘ghosts’ in the final image. Some software comes with a de-ghost function that could help. Finally, be sure your camera is steadily mounted on a rock solid tripod. This is to avoid camera shaking and unintentional movements.
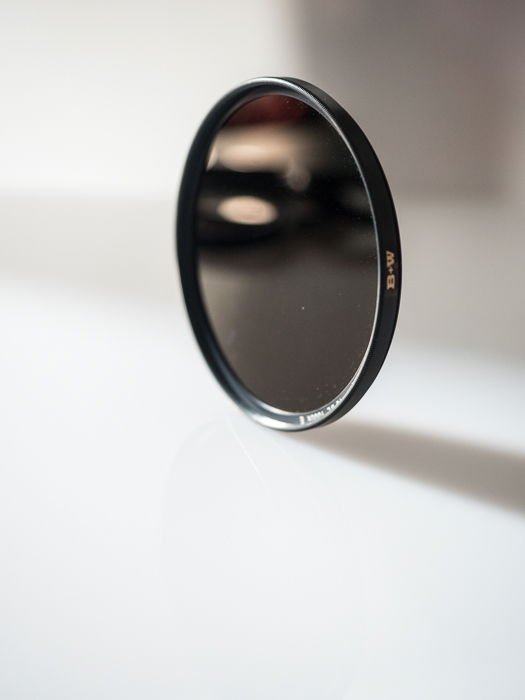
Neutral Density Filters
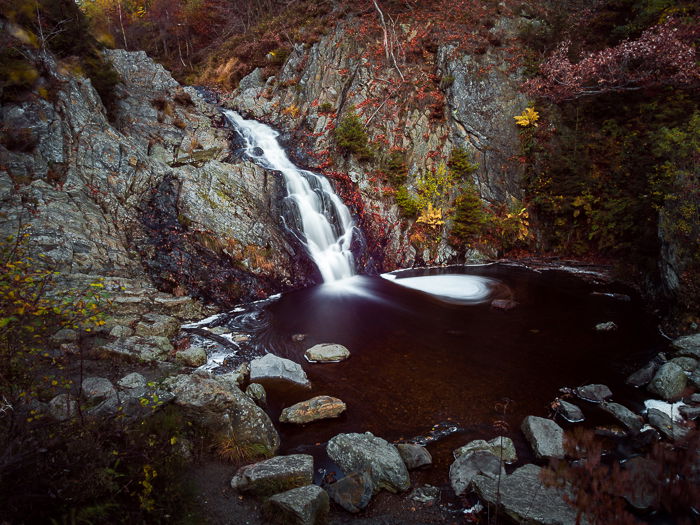
You can use neutral density (ND) filters to cut down the amount of light that hits your sensor in a given amount of time. This allows you to take longer exposures even in daylight. The difference with GND filters is that the ND does not balance areas of different brightness. An ND filter affects them in the same way. For example, ND filters will not change a difference of 4 stops between sky and ground. They come both in square/rectangular and round threaded formats and in different strengths, from 1 to 10 stops. Manufacturers such has Hoya, B+W etc often indicate the strength of their filters as 0.3 (1 stop), 0.6 (2 stops), 0.9 (3 stops), 3 (10 stops), up to 6 (20 stops). In landscape photography, you’ll mostly use them to smooth moving water (rivers, waves, and waterfalls) and clouds. In bright situations, you’ll be able to use them to shoot at wider aperture for composition reasons (shallow depth of field). If you are in a touristy spot, a strong ND filter can help you clear the scene of moving tourists. Photographers often stack ND filters together to achieve the desired strength. Stacking a 0.3 ND filter with a 0.9 one will result in a 4-stop light reduction.
In the Field
Be careful when doing daytime long exposures with square and rectangular filters. These may be more susceptible to light leak than threaded round filters. Sealing the gaps with black gaffer tape can help fix this problem. You need a sturdy tripod to do this kind of long exposures, as you want to avoid any camera movement. Also, these filters will darken your view. It’s best to compose and manually focus before you install the filters (be gentle so as not to move the camera or change the lens focus). Use the mirror lock up function (if you have it) and trigger the shutter remotely or use a 2 second self timer.
The Digital ND Filter
Some cameras (mostly compacts such as the Sony Rx100 Mark 3/4/5, the Canon G1 X and the Fujifilm X100T) have a built-in function that simulates the use of a ND filter: it could be good a start, so check your camera owner manual. The effect of a ND filter can be faked or enhanced by doing image stacking and/or by applying a motion blur filter in Photoshop.
Image Stacking
This technique consists in stacking multiple images in Photoshop as layers and average them. It is easy to select all the layers, convert them in a smart object and then Layers -> Smart Object -> Stack Mode -> Average (you can also try Median). Use as many exposures you need to reach the desired long exposure time: if you wish to do get a 1-minute long exposure, stack 60 exposures, each 1-second long. Obviously this technique works well if the single exposures are at least several seconds long, else the number or images to stack will be huge.
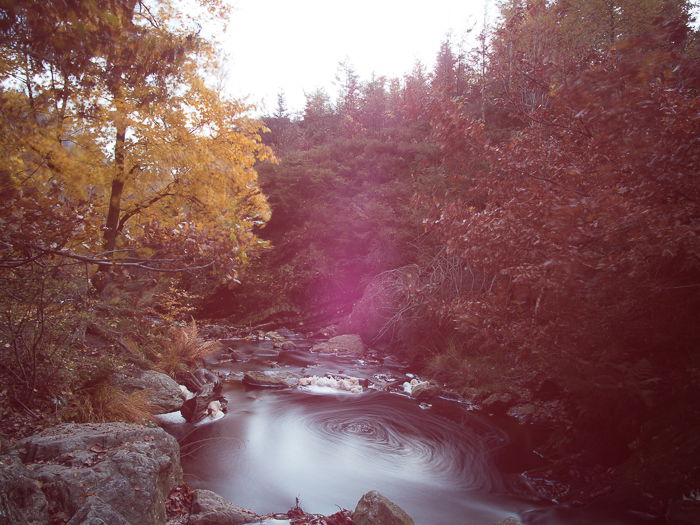
The Motion Blur Filter
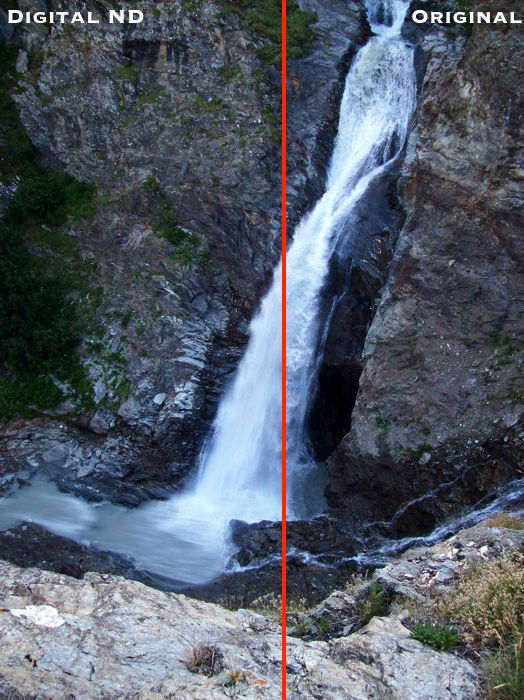
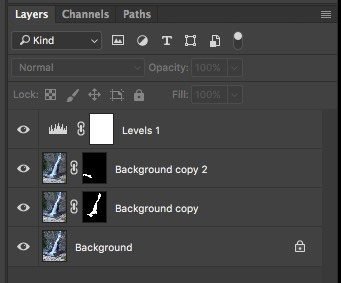
The motion blur filter works well with waterfalls. This method consists in few steps:
Load your photo in Photoshop. Duplicate the level and apply the blur in the direction of the falling water. Tune the filter strength and the opacity to the level until you are happy with the effect. A mild Gaussian blur can also help make the effect more realistic. Use a mask to reveal the original image except for the waterfall. Create more layers and masks if the water flows in different directions.
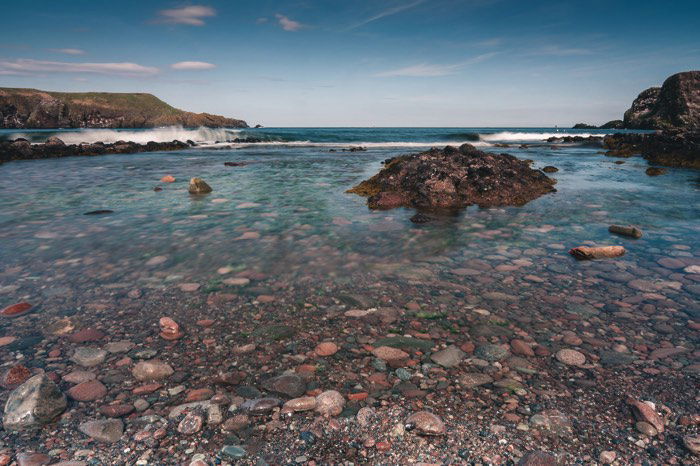
Circular Polariser Filters
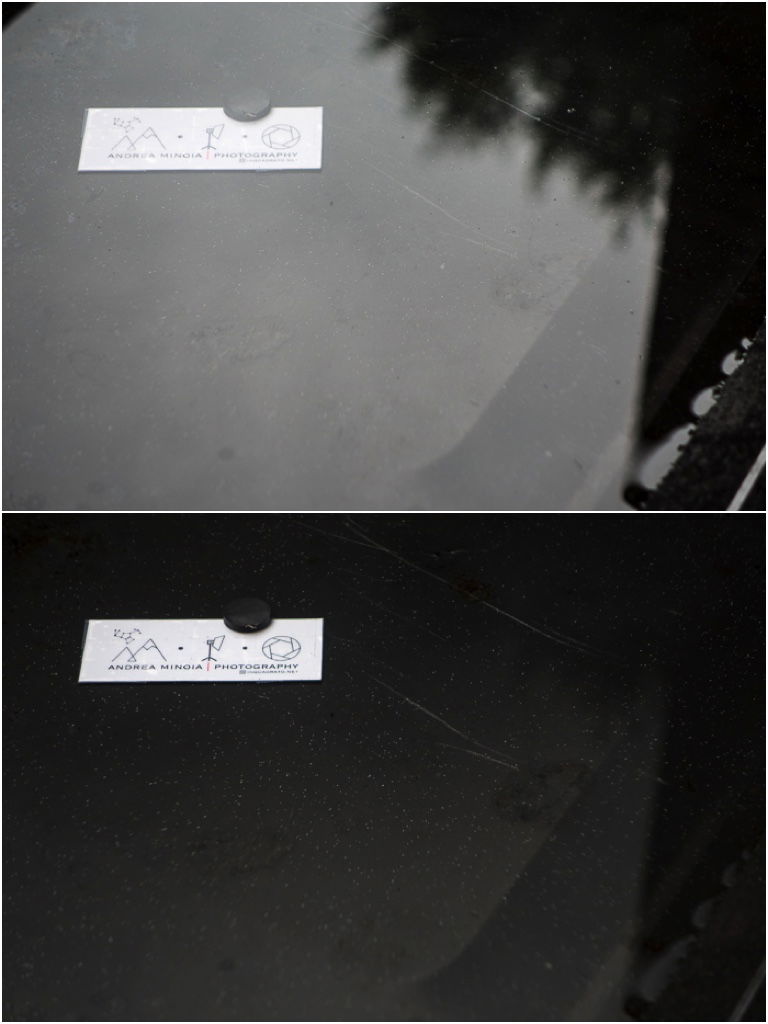
In landscape photography, you can use circular polariser filters (CPL) to eliminate the reflection of the sky from shallow water, making it transparent. Even if it’s a subtle effect, it really improves the photo. CPLs helpfully reduce reflections and glare from snow, glass, wet foliage, and roads. They also help to saturate the blue and green colors typical of the clear sky and foliage. CPL filters work by blocking light with specific polarisation to reach your sensor. (If you are interested in the physics behind this, you can refer to this article on Wikipedia to learn more about light polarisation.) To illustrate the effect of this filter on reflections in water, I put some water in a pan and photographed it with and without the polariser. The difference is quite dramatic. Finally, while circular polariser filters are round only, some square/rectangular holders such as the Nisi V5 Pro holder, can also accommodate a CPL.
How to Use a Polariser in the Field
Place the camera on a tripod, mount the CPL and rotate it until you see the reflections have mostly disappeared from the water or until the color of the sky and foliage improves. You may need to move also the camera a bit in order to maximise the effect of the CPL filter. Beware of using a CPL filter on ultra wide-angle lenses, as the darkening effect on the blue of the sky will not be homogeneous due to the physical principles behind the how CPL filters work. As CPL filters usually reduce the exposure by about 2 stops, you can use them to replace a 0.6 ND filters.
The Digital CPL Filter
There is no real digital version of a CPL filter, particularly if you are using it to eliminate reflections. It is one of those filters that have no real digital counterpart. Sometimes, as shown in this post on the Adorama Learning Center, you can digitally get quite close to the darkening and saturating effect a polariser has on blue sky.
Infrared Filters
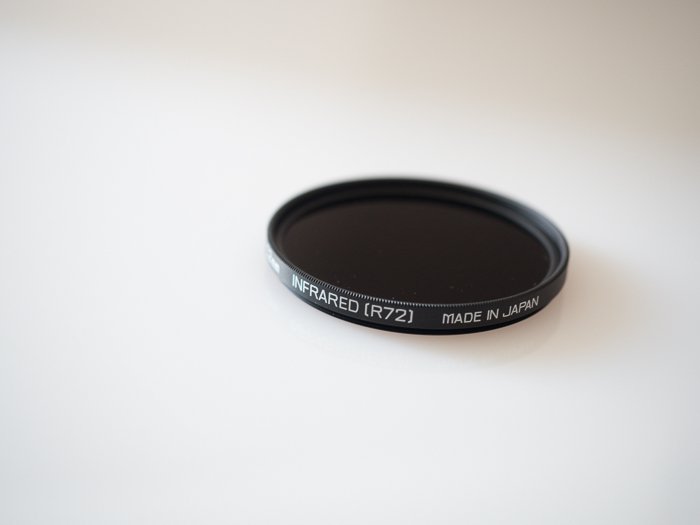
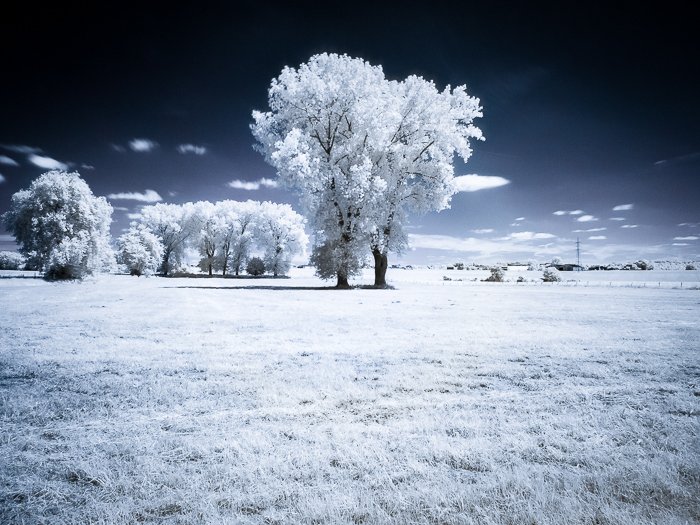
Infrared photography is quite a niche, but it can be done at very little cost and, often, with a standard camera. As far as you limit yourself to long exposures, all you need is an infrared filter such has the Hoya R72. Infrared photography works best during the central hours of the day, with the sun high up and harsh, hard light. Because of this, it’s possible to keep shooting landscapes all day long and not limit yourself to the golden to the blue hours. Finally, because we do not see the world with infrared light, infrared landscape photos have a big ‘wow factor’ and capture the attention of the viewer.
Using an Infrared Filter in the Field
Use a sturdy tripod, place the filter on your lens and then manually focus the scene. The IR light could throw off your camera’s autofocus. Your light meter will not be as accurate as in visible light, so it is best do some bracketing and take few photos at different exposure values. I recommend using a camera that has live view to accurately compose and focus.
The Digital IR Filter
Lightroom comes with an infrared presets, which will convert to black and white your photo taken with visible light and play with the settings to fake the infrared effects. However, it’s not great and it doesn’t come close to what you get from using a real IR filter.
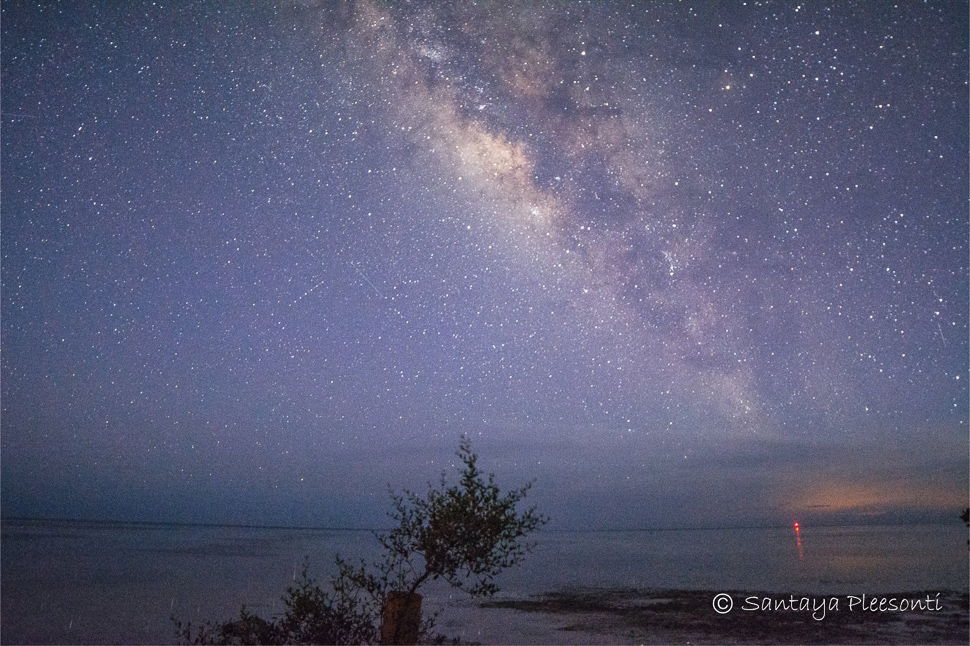
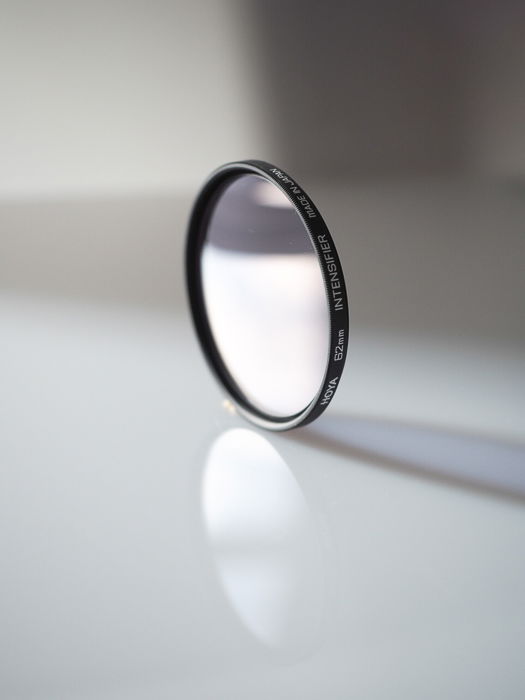
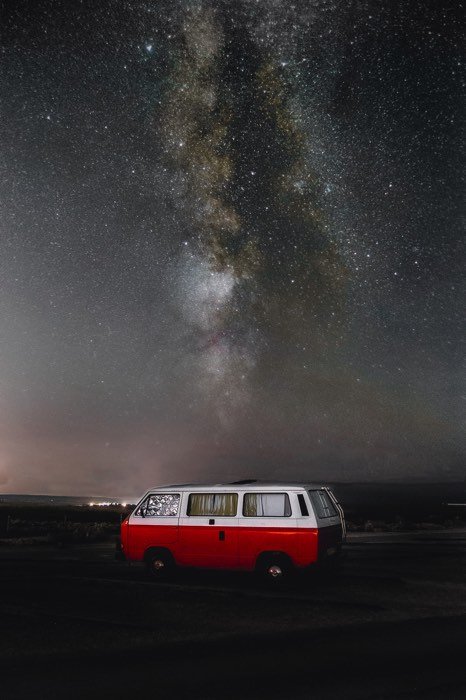
Light Pollution Reduction Filters
The last type of landscape photography filter to know is the light pollution reduction filter. You can use these for night photography to reduce the light pollution from street lights and other man-made light sources. There are two kinds of filters:
Neodymium filters such as the Hoya Red Intensifier (also used to boost red colors in autumn foliage), Nisi Natural Night and Bader Planetarium filters, are relatively cheap and can work with wide-angle lenses Interference filters such as the Astronomik CLS filters, are more effective but more expensive and cannot be used on anything shorter than 70 mm as at wider focal lengths severe banding will ruin your photos (one exception could be the Astronomik clip filter system made for Canon camera bodies, which sits in between the rear element of the lens and the sensor).
Note that how effective those filters are will depend on the kind of light pollution you have around, as they suppress only light of particular wave lengths. If you are interested in nocturnal landscape photography, I have covered this topic in great detail in this article.
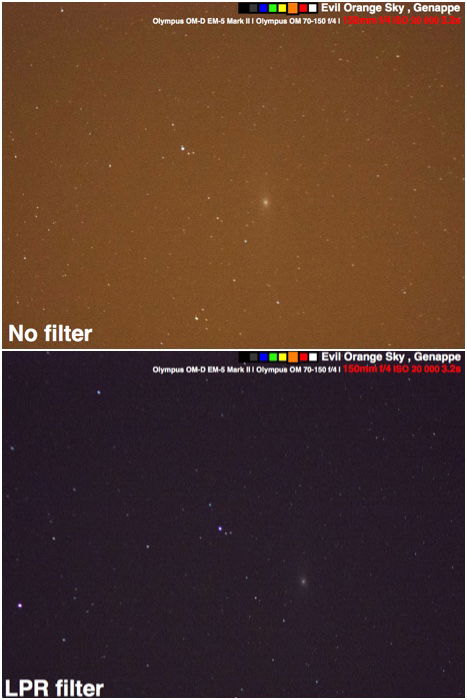
Digital LPR filters
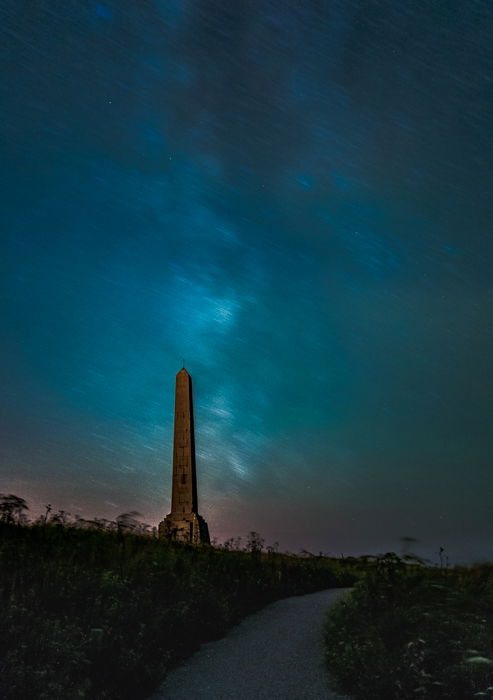
It’s possible to reduce the ‘evil orange sky’ glow and decrease color casts and luminosity gradients across your image through careful and somewhat complicated editing, but there is no real digital replacement for a good LPR filter. LPR filters are essential for deep sky astrophotography in light polluted areas, as you can see in the image below.